

Add Padding to Image
Add padding to an image when a site crops your photo or rejects its shape. Put space on any side, in pixels or percent, and fill it with a color, transparency or a blur. Nothing gets cut off.
Free to use · No signup · No watermark
Step 1: Add your photo
JPG, PNG or WebP. It stays on your device.
Drop your image here
Then add space around it. Nothing is uploaded.
Your image is padded in your browser and never uploaded.
What Adding Padding to an Image Does
Padding makes the canvas bigger and leaves the photo alone. A 1200 × 800 picture with 100 pixels added on each side becomes a 1400 × 1000 file, and the original 1200 × 800 still sits inside it at full detail.
That makes it different from the other ways of changing an image's shape. Cropping cuts pixels away. Stretching pulls the picture out of proportion. Padding adds room around it, so it is the one to use when every part of the photo has to stay in view.
A product shot might need a white square for a shop listing. A landscape photo might need to fill a vertical story without black bars, or a logo might need room around it before it goes on a slide. The picture is fine in all of these cases. Only the shape of the canvas has to change.
| Method | Keeps all of the photo | Keeps proportions |
|---|---|---|
| Padding | Yes | Yes |
| Cropping | No, edges are cut | Yes |
| Stretching | Yes | No, it distorts |
Need to crop or stretch instead? The Image Stretcher does both.
How to Add Padding to an Image
- 1
Upload your image
Drop a JPG, PNG or WebP file onto the tool, choose it from your device, or paste a screenshot with Ctrl+V or Cmd+V.
- 2
Set the padding
Add the same space on every side, or a different amount on each edge, in pixels or percent. Then choose a color, transparency or a blurred background.
- 3
Download the result
The preview updates as you change settings. When it looks right, download the file as PNG, JPEG or WebP.
Three Ways to Use Padding
Each result below came from the same settings you can pick in the tool. The labels show the real image sizes.
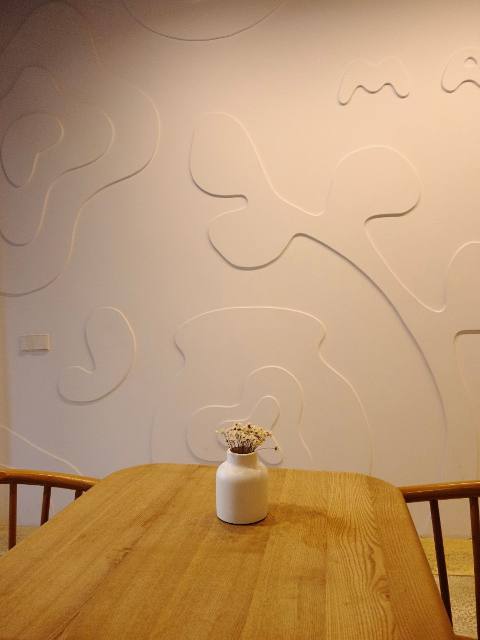
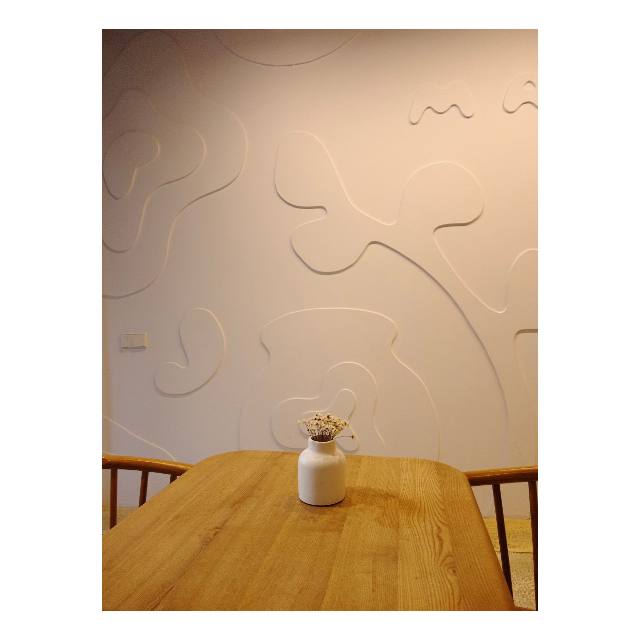
A product photo on a white square
px · 210 left and right · 60 top and bottom · white
The vase photo is 900 × 1200, so cropping it square would cut off part of the wall or the table. Adding 210 px to the left and right and 60 px above and below gives a 1320 × 1320 square, with a little space at the top and bottom too.
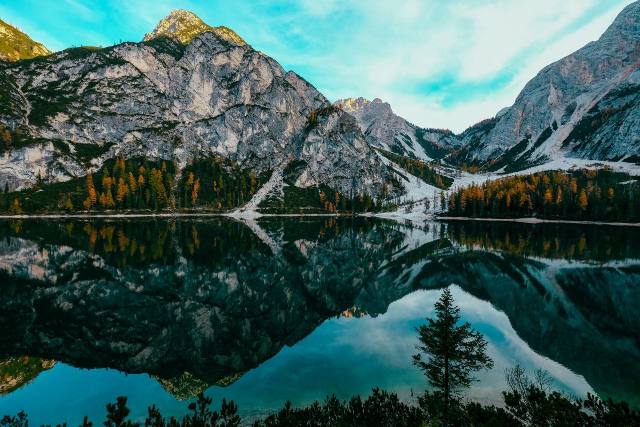
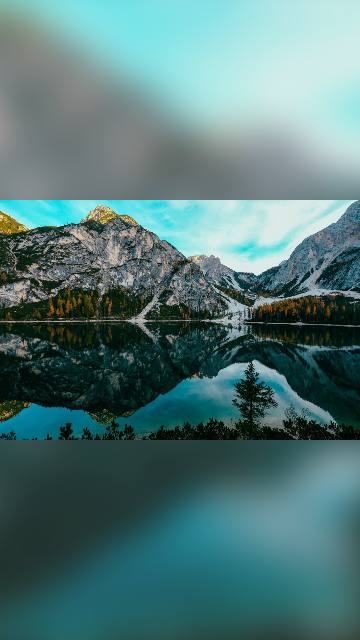
A landscape photo turned into a vertical story
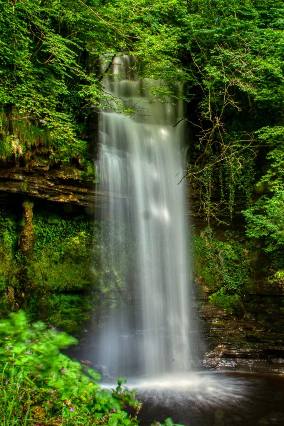
px · 667 top and bottom · blurred photo
A 1200 px wide story at 9:16 is about 2134 px tall, so this 1200 × 800 photo needs 667 px above and below. A blurred copy of the same picture fills that space with its own colors, so it doesn't look like black bars.
A framed print look
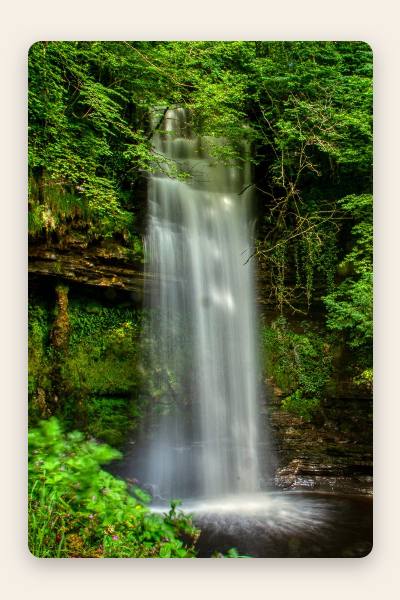
8% on every side · cream · rounded corners · drop shadow
Even padding in a soft color looks like the mount around a printed photo. Because percent padding scales with the photo, the frame keeps the same proportions on a small image and a large one.
Padding in Pixels or Percent
Pixels: when you need an exact amount
Use pixels when a brief says something like "50 px of white around the logo", or when you are working toward a set size. To reach a shape such as a square, add the difference between the width and height to the shorter edges. The Aspect Ratio Calculator can work out the target size for other shapes.
Percent: when you pad photos of different sizes
Percent padding grows with the photo, so 10% looks the same on a small image and a large one. Left and right are measured against the width, top and bottom against the height. To add space to only one edge, such as room at the bottom for a caption, untick "Same on all sides".
Padding for Instagram, Stories and Online Shops
Shapes and rules for three places people often post padded images.
4:5 or 1:1
Instagram feed posts
Instagram takes photos between 1.91:1 and 4:5. Anything taller or wider is cropped, according to Instagram's Help Center.
A tall 1080 × 1920 phone photo needs to be 1536 px wide to reach 4:5, so add 228 px to the left and right. For a square, add half the difference between the height and width to each short edge.
9:16
Stories and Reels covers
Vertical stories use a 9:16 frame, close to the shape of a phone held upright. A 1200 × 800 landscape photo needs about 667 px above and below to fill that frame instead of sitting in a strip of black.
The blurred background works well for this. Keep text and faces away from the very top and bottom, where the app puts its own buttons.
1:1 · white
Amazon main images
Amazon asks for a pure white background (RGB 255, 255, 255) with the product filling about 85% of the frame. See Seller Central's product image guide.
With percent padding on every side, 5% lets a tightly cropped product fill about 91% of the width and height. At 8% it fills about 86%. At 10% it drops to 83%, below the guideline.
The Amazon figures assume the product already reaches the edges of your photo. If your photo has its own background around the product, it will fill less of the frame, so use less padding or crop tighter first. Platform rules change, so check the linked pages before a big upload.
Choosing a Background for the Padding
- Use white for product photos, documents and anything that will sit on a white web page, where the padding blends into the page around it.
- On social posts, a color picked from the photo itself tends to look more intentional. Use the color picker, or type a hex code from your brand colors.
- Choose transparent for logos and cut-out images that will go on different backgrounds, and save as PNG or WebP. JPEG turns the transparent area white.
- The blurred photo option suits landscape pictures going into vertical formats. If the background pulls attention from the sharp photo in front, turn the blur strength up.
Frequently asked questions
What is image padding?
Padding is extra space added around the edges of a picture. The canvas gets bigger, and the photo stays the same size in the middle of it.
Nothing is cut off and nothing is stretched. The new space is filled with a color, left transparent, or filled with a blurred copy of the photo.
Can I add a different amount of padding to each side?
Yes. Untick "Same on all sides" and type a value for top, right, bottom and left, in pixels or as a percent of the image size.
How do I make an image square without cropping it?
Add padding to the two shorter edges only. Take the difference between the width and height and split it in half. For a 1200 × 800 photo that is 200 px, so switch to px, untick "Same on all sides", and set top and bottom to 200. The result is 1200 × 1200.
Can I add transparent padding to a JPG?
Yes, but the file you download can't be a JPG. JPEG has no transparency. With the background set to Transparent and the format on Auto, a JPG is saved as a PNG so the empty space stays see-through.
If you pick JPEG anyway, the tool fills the padding with white and tells you so before you download.
Does adding padding lower the quality of my photo?
The tool draws your photo at its original pixel size, so the photo itself is not resized. PNG keeps every pixel exactly as it was. JPEG and WebP save at 92% quality. That is usually hard to tell apart from the original, but the file is still re-encoded.
One case does shrink the photo: if the padded image would be wider or taller than 4,096 pixels, or larger than 16 megapixels, the tool scales the whole result down to fit and shows you by how much.
What is the difference between padding and a border?
People often use the two words for the same thing. Strictly speaking, padding is space added outside the photo, and a border is a line or frame drawn around it. This tool adds space. Even padding in a solid color on every side gives the look most people mean when they ask for a border around a photo.
Why does my image need padding for Instagram?
Instagram accepts feed photos between 1.91:1 (wide) and 4:5 (tall). According to its Help Center, a photo outside that range is cropped to fit. If you add enough padding to bring a tall or very wide photo inside that range first, Instagram has nothing to cut.
Are my images uploaded anywhere?
No. Your own browser opens, pads and saves the image. Nothing is sent to a server, and nothing is kept after you close the tab.