

Stretch vs Resize vs Crop vs Fit: What's the Difference?
Stretch, resize, crop and fit compared on one 1200×800 photo: the exact numbers, a quick guide to choosing, how to combine modes, and where each goes wrong.
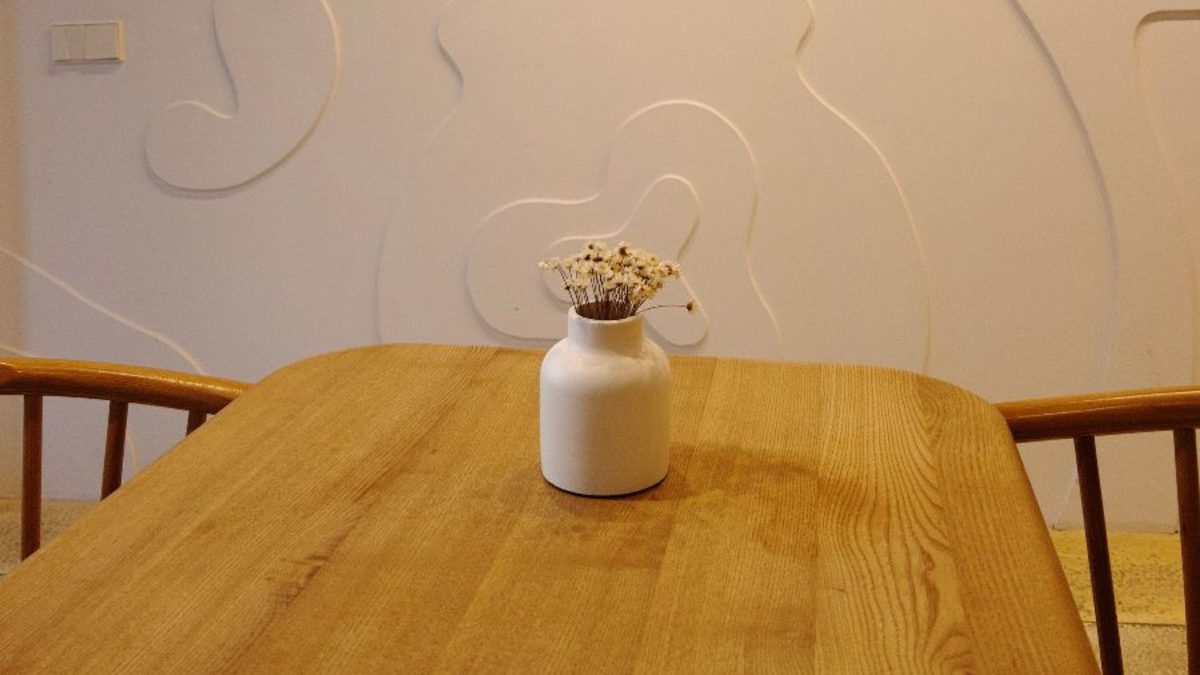
The difference between stretch, resize, crop and fit is the math each one uses to reach an exact pixel size. Knowing the formula behind each one makes it obvious which to reach for.
Which Mode to Use: The Short Answer
- Need an exact size and don't mind changed proportions? Stretch.
- Need to scale up or down but keep proportions exact? Resize.
- Need an exact frame with nothing cut off? Fit.
- Need an exact frame with no empty space, and cropping is acceptable? Crop to fill.
Stretch
The source is scaled to the target width and height independently: horizontal and vertical scale factors are calculated separately and neither has to match the other. A 1200×800 image stretched to 1800×800 uses a horizontal factor of 1.5 and a vertical factor of 1. Nothing is cropped and no padding is added; the whole source simply fills the new rectangle, proportions changing along the way.
How far you can push that before it shows depends on the photo: see how to stretch a photo for the percentages.
Resize (proportional)
Only one side is set directly; the other is calculated from the source's original ratio and rounded to the nearest whole pixel. For a 1200×800 source, setting the width to 600 computes a height of 800 × (600 ÷ 1200) = 400. The output is always 600×400, so you cannot land on two arbitrary, unrelated numbers in this mode.
Fit (no cropping)
The scale factor is the smaller of targetWidth ÷ sourceWidth and targetHeight ÷ sourceHeight, so the entire image ends up visible, then it's centered on the target canvas. Fitting a 1200×800 image into a 1200×1200 canvas uses scale = min(1200/1200, 1200/800) = 1, so the image is drawn at its original 1200×800 and centered, leaving 200px of padding above and 200px below.
Crop to fill
The scale factor is the larger of the two ratios, so the scaled image is at least as big as the target in both directions, then the overflow is clipped, centered by default. Cropping that same 1200×800 image to fill 1200×1200 uses scale = max(1200/1200, 1200/800) = 1.5. At that scale the image would be 1800×1200, which is 600px wider than the 1200px target, so 300px is trimmed from the left and 300px from the right to land on the final 1200×1200 output.
Side-by-side comparison
| Mode | Fills exact size? | Keeps proportions? | Crops content? | Best for |
|---|---|---|---|---|
| Stretch | Yes, exactly | No | No | Banners, textures and backgrounds where a slight distortion is fine or intentional. |
| Resize | No — one side follows the other | Yes | No | Simple downsizing or enlarging where proportions must stay intact. |
| Fit | Yes, with padding | Yes | No | Product photos, screenshots or documents where every pixel of the original must stay visible. |
| Crop to fill | Yes, exactly | Yes (of the visible part) | Yes, overflow is clipped | Thumbnails, avatars and cover images that must fill a fixed frame with no empty space. |
The Same Photo in a Square Frame
The clearest way to see the difference is to give all four modes the same job: turn a 1200×800 photo into a 1200×1200 square. The numbers come from the formulas above, so you can check them by hand.
| Mode | Scale applied | What you get | What is lost |
|---|---|---|---|
| Stretch | 1.0 across, 1.5 down | The whole photo, 50% taller than it should be | Proportions |
| Resize | One side only | A 1200×800 photo; it can never be a square | Nothing, but no square either |
| Fit | 1.0 on both sides | The whole photo with 200px of padding above and below | Nothing, but a third of the frame is empty |
| Crop to fill | 1.5 on both sides | A full square, with 300px trimmed from each side | Both outer edges of the photo |
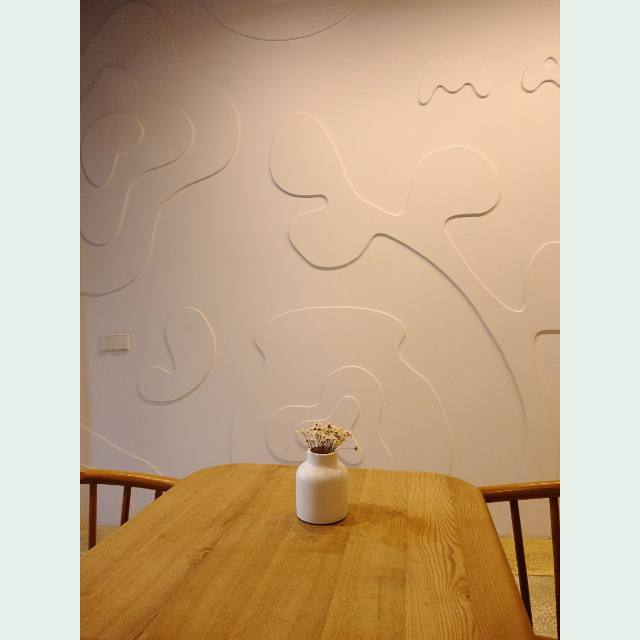
Fit: the whole vase photo, with padding added.
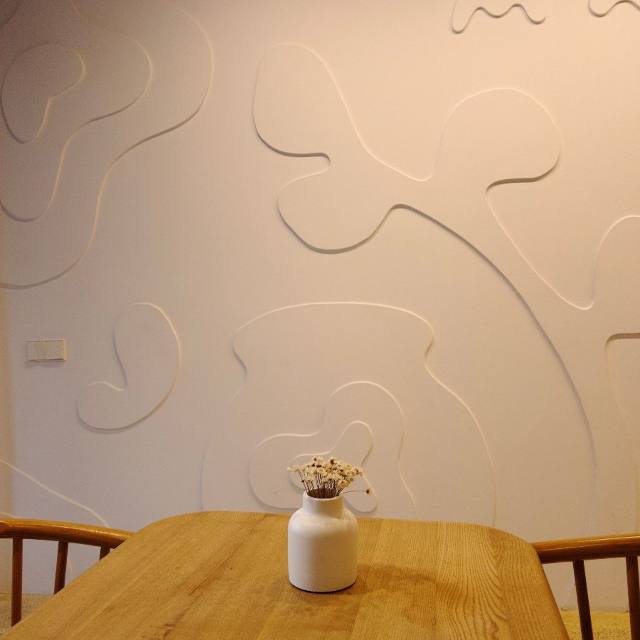
Crop to fill: no padding, but the edges are gone.
Where Each Mode Goes Wrong
- Stretch bends anything with a known shape. Faces, wheels, logos and lettering are the first things people notice. A circle turns into an oval long before a cloud looks odd.
- Resize refuses to give you two independent numbers. If a form asks for exactly 800×800 and your photo is 1200×800, this mode cannot produce it.
- Fit adds empty space. Whatever fills that space shows up in the final file, so check the preview before you download.
- Crop to fill throws pixels away. A subject near the edge, or text along the border, can disappear without any warning.
Two problems apply to every mode. Enlarging a small photo never adds detail, it only spreads the existing pixels over a bigger area. And these modes change the pixel size, not the file size, so a smaller image can still be too heavy for an upload form.
Which Mode for Which Job
| Job | Best mode | Why |
|---|---|---|
| Profile picture or avatar | Crop to fill | The frame must be filled and the subject is usually in the middle |
| Product photo on a square listing | Fit | Every edge of the product stays visible |
| Wide banner from a texture or sky | Stretch | Soft detail hides a change in proportions |
| Shrinking a photo for email | Resize | The shape stays exactly as shot |
| Screenshot or document in a fixed frame | Fit | Text must not be cut or bent |
| Making a portrait photo wider | Fit or Crop to fill | Stretching would fatten the subject |
If the job is a specific platform size, the social media image sizes page has ready-made dimensions. If a photo needs space around it without being enlarged, the add padding to image tool does only that.
Combining Modes
You can also use the modes together.
- Crop first, then resize. Cut away what you do not want, such as a stranger at the edge or a strip of empty sky, then resize what is left to the pixel size you need. The result keeps the proportions of the cropped area, so nothing is bent.
- Split a small mismatch between crop and stretch. When the photo's shape is close to the target, a little trimming plus a little stretching can look better than doing all the work with one mode. Check the preview, and see how far you can stretch a photo before it shows.
Common Questions
Is stretching the same as resizing?
No. Resizing keeps the original proportions and changes one side to match the other. Stretching sets width and height independently, so the shape changes.
Which mode keeps the best quality?
None of them adds detail. Quality drops when you enlarge a photo past its original size, and the mode you pick only decides what happens to the shape. Start from the largest original you have.
Does changing the pixel size change the file size?
Usually, but not in a way you can set. Two images with the same dimensions can differ a lot in weight because of content, format and compression. To land under a limit such as 100 KB, use resize image to KB.
Can I change only the width or only the height?
Yes, in Stretch: change one number and leave the other alone. In Resize you set one side and the other follows automatically, so the shape never changes.
Try All Four on One Photo
Try all four on the same file in the image stretcher. Its Compare tab puts the original beside the result. If you need to work out a missing side for a ratio first, the aspect ratio calculator does that arithmetic.

 Photo Stretcher
About Sabir Ali
Founder of Photo Stretcher
I built Photo Stretcher because resizing an image online usually means uploading it to a stranger's server and hoping for the best. Everything here runs in your browser instead: a stretcher, a resizer, a KB compressor, a converter. Your files never leave your device, and no pixel is invented by AI.
I review every guide on this site before it goes live. If a method stops working, I update the guide.